BL firmware
- Please note that the
bootloaderhas already been pre-flashed, no need to flash again
Enter programming mode
- There are two ways to enter programming mode
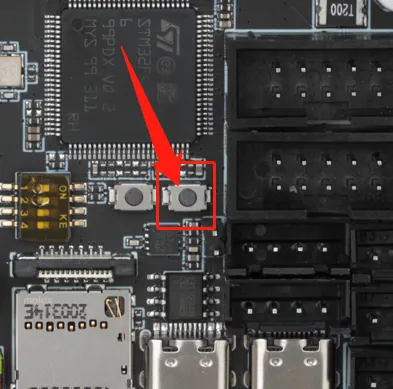
- First method: With the mainboard completely powered off, long press BOOT and connect one end of a data transfer cable to the mainboard and the other end to your device, suitable for WINDOWS
- Second method: After connecting one end of a data transfer cable to the mainboard and the other end to your device, long press BOOT and enter the command, suitable for the host computer
Programming the firmware
- Windows programming tutorial
- Host computer programming tutorial
-
C8 bootloader firmware
- Click the download link below
-
Loading...
-
Set the dip switches
3,4to the right, connect the lower machine and the host computer via the built-in USB -
Set the dip switches
1,2to the left, otherwise it will affect the connection between the lower machine and the host computer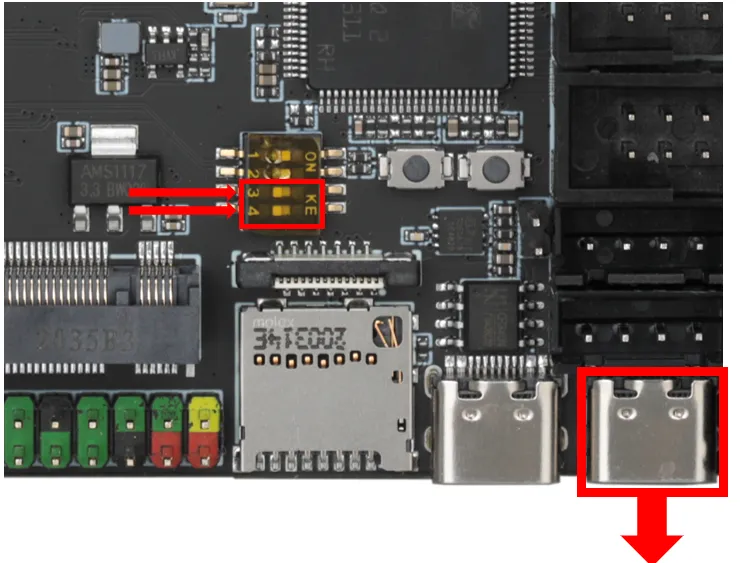
USB3.0may fail to flash, please try to use the computer'sUSB2.0for flashing- If flashing still fails, please try using the host computer to flash
- If the following error appears, please use a USB hub
- Flashing tool Download Link
- Please download
SetupSTM32CubeProgrammerandSTM32 DFU driver - Download the firmware to any directory on your computer
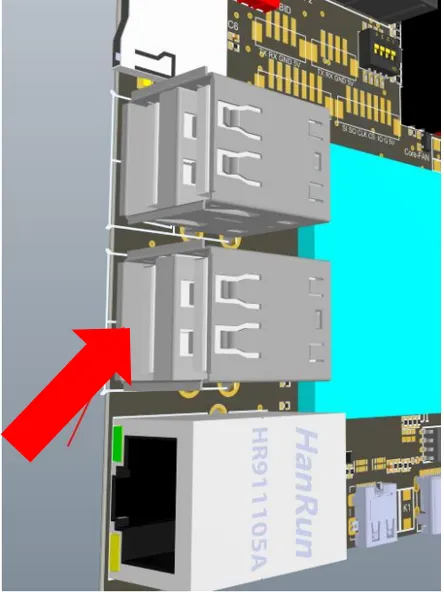
- Connect the main board to the computer using a Type-C cable, and ensure it has entered
dfuflashing mode - In STM32CubeProgrammer, select USB mode, then refresh and connect
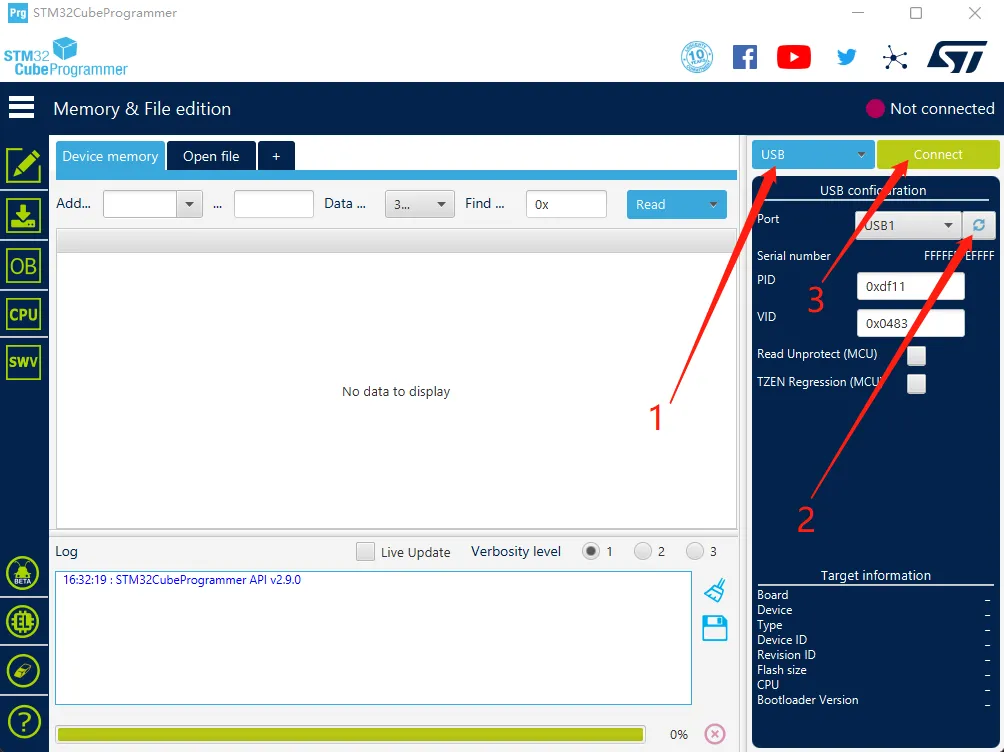
- If no error pop-up appears, the connection is successful.
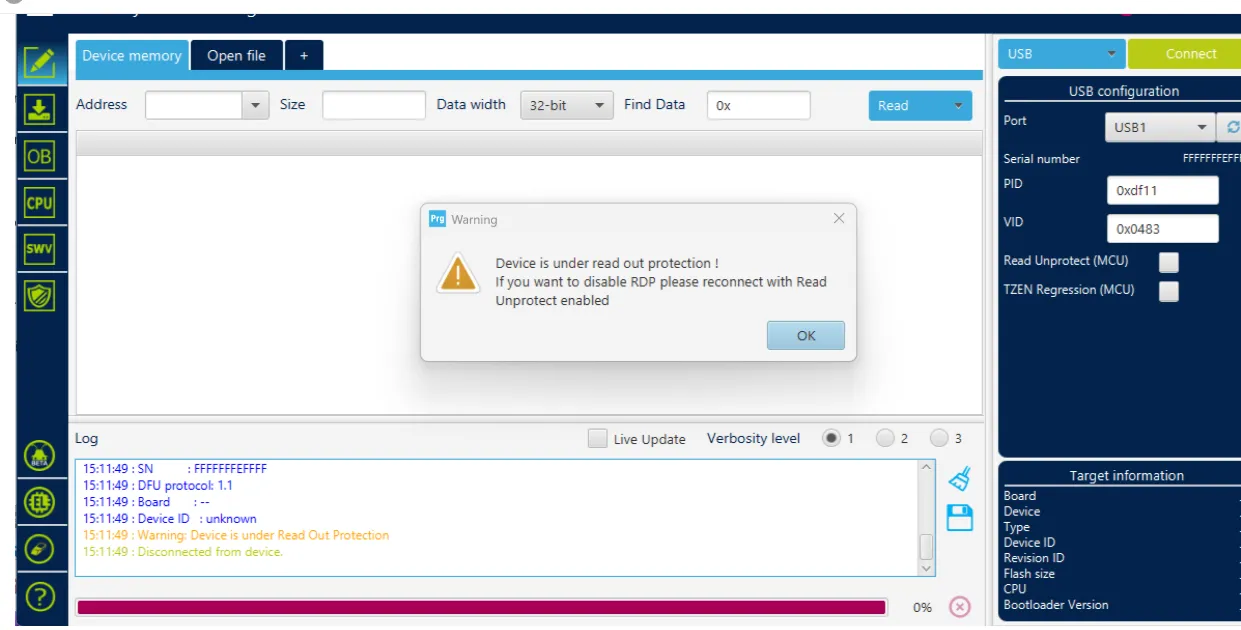
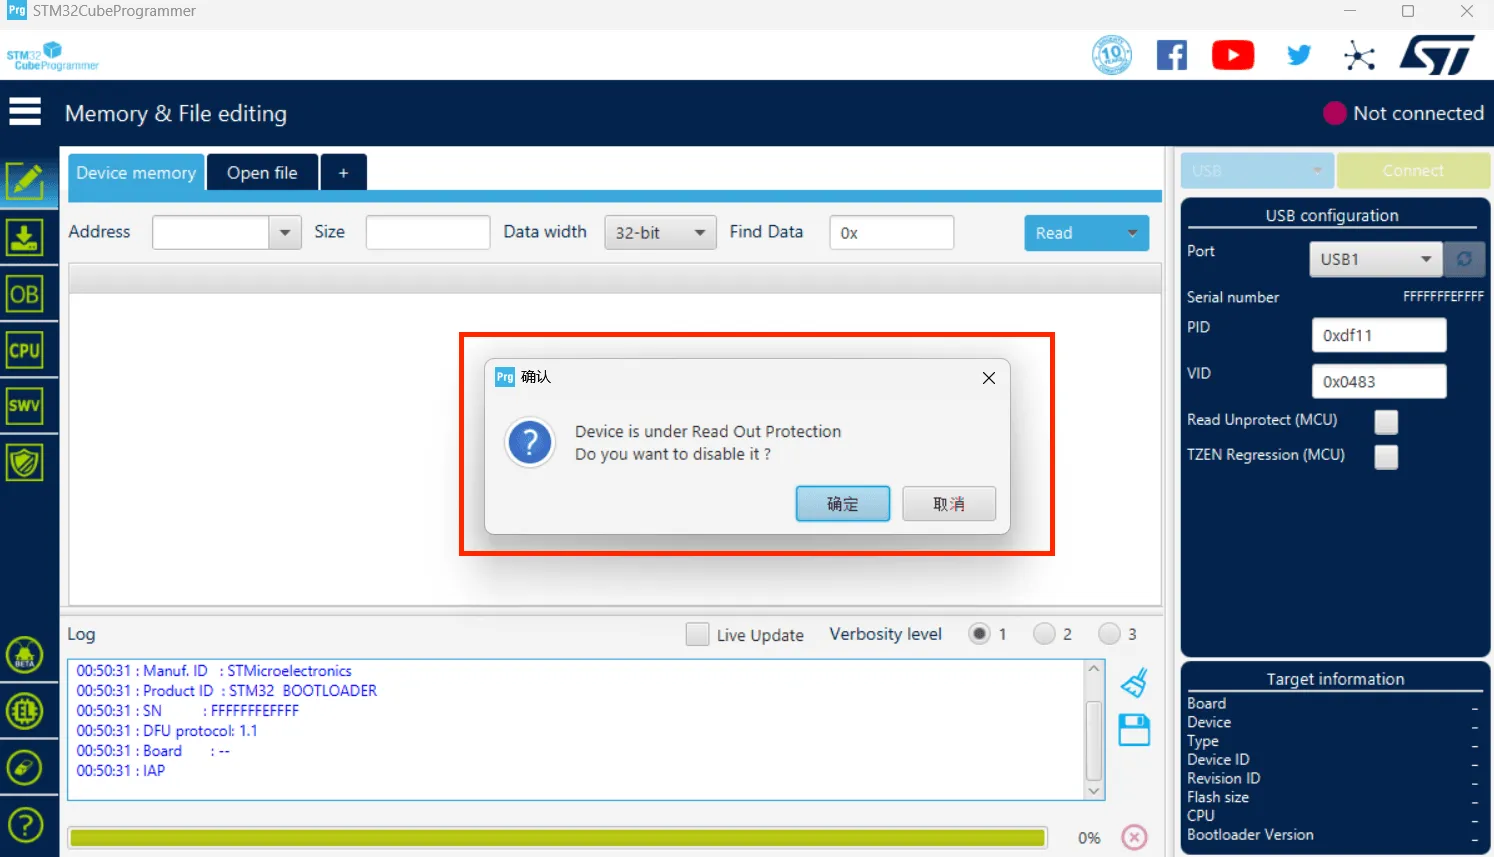
Warning
If the following screen appears, it indicates a computer or software issue. Please flash using the host computer: Host Computer Flashing Tutorial
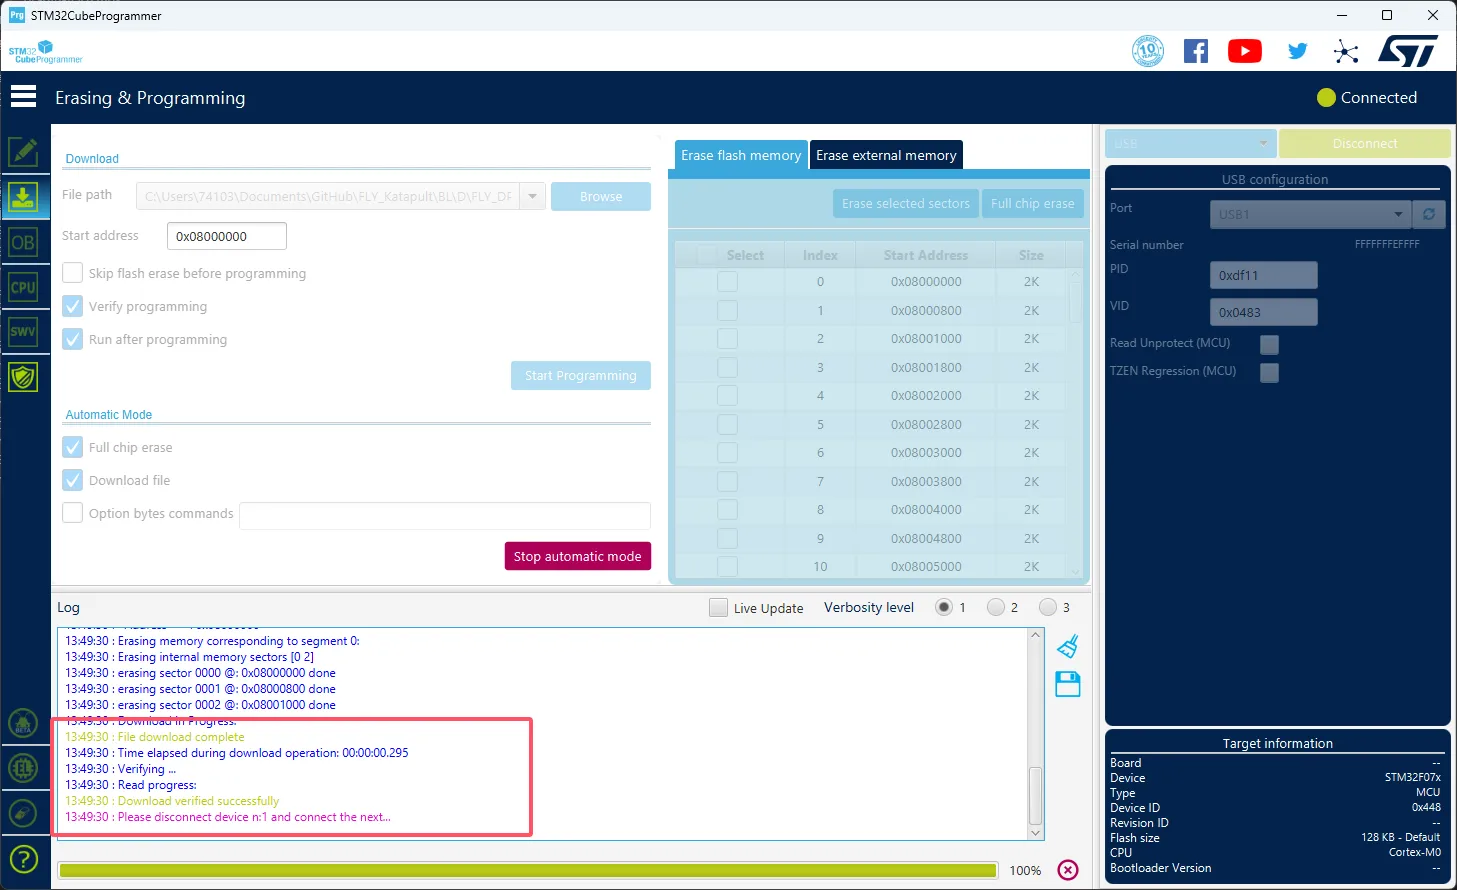
- Click the download icon on the left and select the options below

- Click the
Browsebutton as indicated by the arrow, then select the firmware you need to flash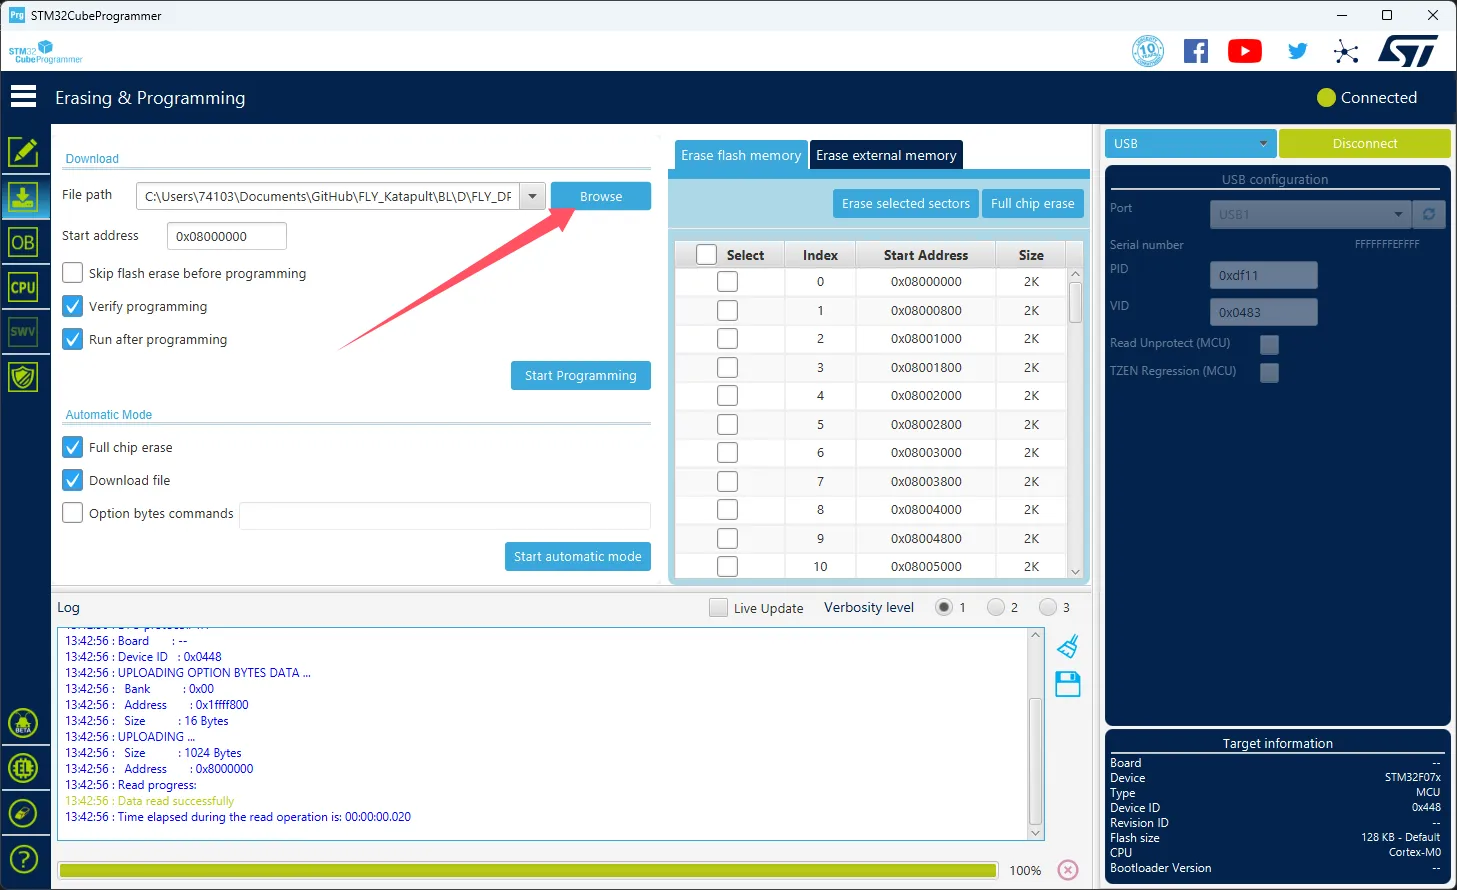
- Select
Start addressand enter0x08000000- Please note, if the firmware is in
HEXformat, please skip this step!!

- Please note, if the firmware is in
- Click
Start automatic modeat the bottom to begin flashing the firmware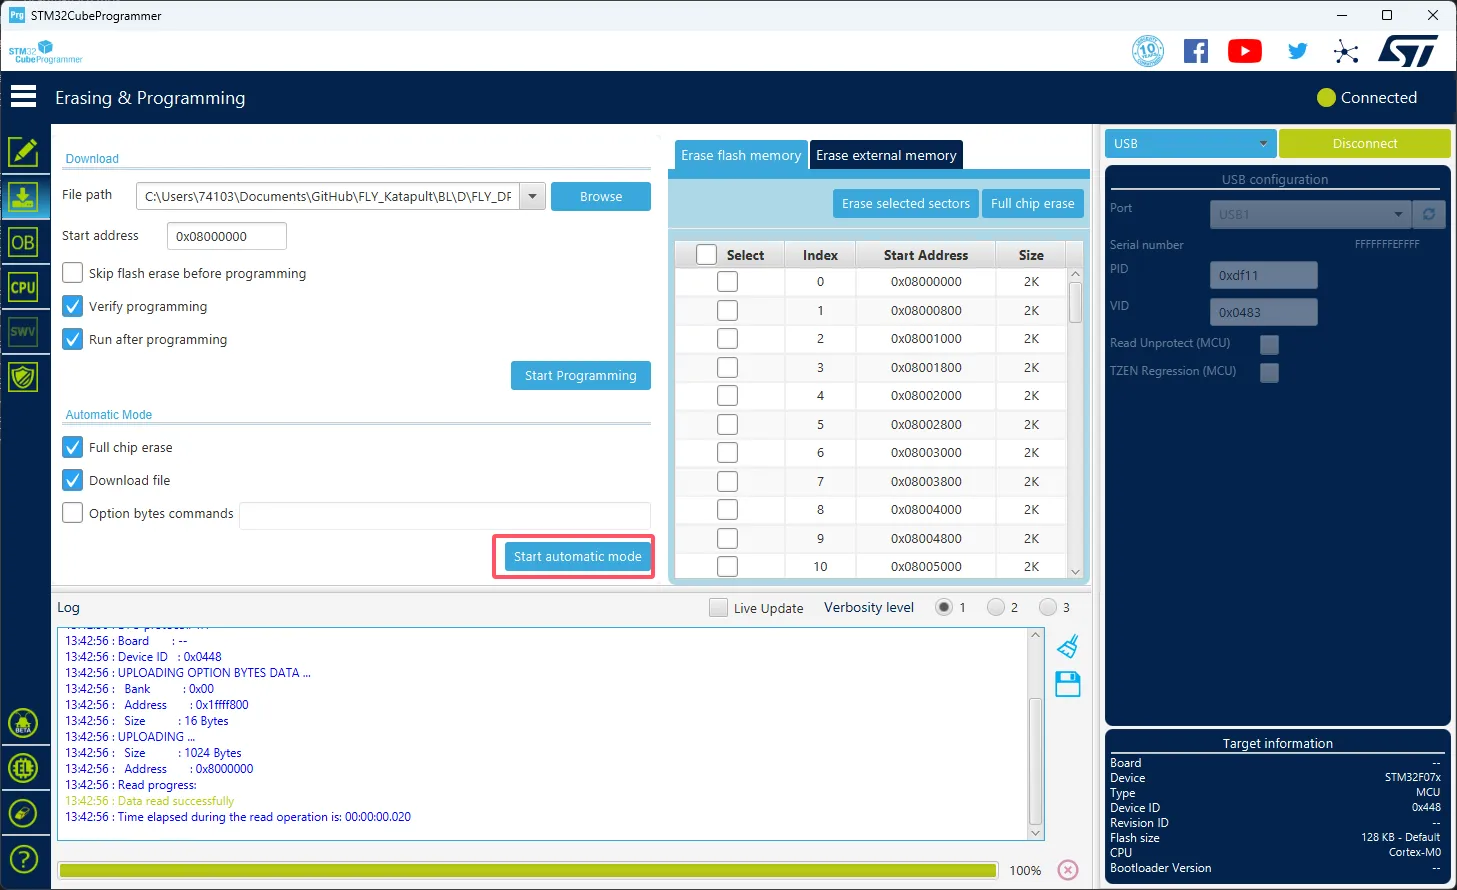
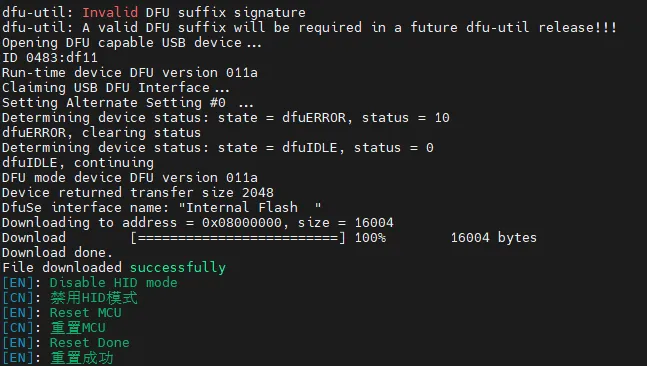
- The following prompt indicates that the firmware flashing is complete
-
Set the dip switches
1,2to the right, connect the lower machine and the host computer via the built-in USB -
Set the dip switches
3,4to the left, otherwise it will affect the connection between the lower machine and the host computer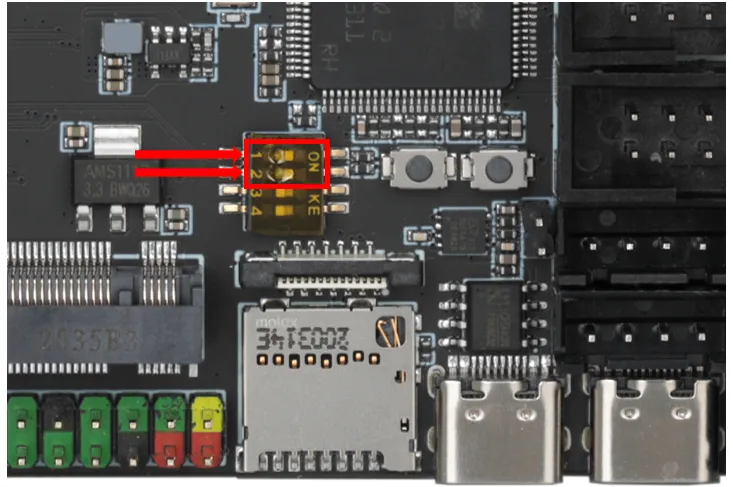
-
After setting the dip switches as described above, the USB port below will be occupied by the lower machine, please do not connect other devices
-
Please ensure the host computer can access the internet
sudo wget https://cnb.cool/3dmellow/public/static-files/-/git/raw/main/firmware/HIDBL.bin -O ~/HIDBL.bin && sudo fly-flash -d c8 -u -f ~/HIDBL.bin -
When the following prompt appears, long press the BOOT key on the lower machine and then press Enter
-
When the following image appears, it indicates that the programming is successful and you can release the BOOT key